Text-image
|
 A specific font which you use on a web page should be installed in local to make the specific font appear correctly on browser. For instance, if you use "Myriad Pro" font on your published page, visitors who don't have the font on their computers can see an alternated font like "Arial" or "Times" instead of "Myriad Pro" font. That's why many websites use web-safe fonts instead of other stylish fonts. However here is a very simple tip to allow you to be able to use your desired fonts beyond the standard.
|
|
Instruction
 This is NOT a text but an image. This is NOT a text but an image.
-
Add Text Box by clicking "Text Box" icon on the bottom menu.

-
Type any texts you wanna insert. If you have done, select the text box like the below image. Then input Command + T on your keyboard or you can click "Fonts" button on the bottom-right menu in order to open Font window. Usually, the default font would be set as "Arial" or "Helvetica Neue", but we will try to convert text to image meanwhile changing your desired font.
-
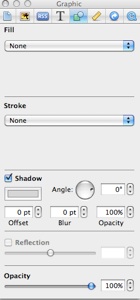
To change the font, you can just select a font of the lists. In this guide, I chose "Myriad Pro" font. You can see that the font of the whole text is changed to the chosen font. Now, we will try to convert the text to image. Open "Inspector" window by clicking "Inspector" button on the right-bottom menu, and select "Graphic Inspector" on Inspector window. Make sure the text box is being selected.

-
Check on "Shadow" and make sure Offset is "0 pt", Blur is "0 pt", Opacity is "100%", and Angle is "0˚". These option values are depends on your style. You can modify these options as your style. As offset is increased, shadow will be stronger. The option values I set is used for None-shadow, just like flat-text. (Some browsers in particular IE make this effect look awful. You would be required to check it on different browsers. Remind you that there are many different types of people. Some of them use IE.)
-
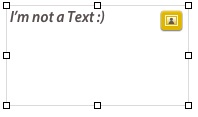
If you have done, you can see small yellow-box around the changed text box. The yellow box is a sign which tells you the text is IMAGE not a TEXT.
-
Some of users may not see the yellow box even if you have done it. Whether this sign appears or not is optional. You can check the option on iWeb > Preference. If you wanna show it, make sure "Show text imaging indicator" is ON.

-
The last thing you need is to publish your modified page. If you upload, you can find "shapeimage_X.png" (in your "webpage name_files" directory) on your server such as your hosting server (If you publish your site into local folder, you can find it in the site directory). iWeb automatically assigns the image filenames like "shapeimage_1.png", "shapeimage_2.png", and ... After you publish it, you can copy the image file onto your hard drive, and then drag it onto iWeb. After that, you can remove the modified text box. (I usually do this way, because some of browsers present its shadow as stronger than itself, especially on IE. I recommend to check how look it is across the platforms.)
Converting text to image is a very useful in several cases because you can make use of a special font on cross-platform. However, I wouldn't recommend you to use it in many cases. This is because search engines like Google can't find the text and also readers can't select and copy the texts. It is IMAGE, not a TEXT. If you have important contents which you want people to search, please don't convert it to an image. Just type it as a web-safe font like "Arial" or "Lucida Grande" font. I would recommend you to apply this for Heading or other short texts to use a stylish font.
|