Monetize website
|
 Google AdSense is a free service to help your website generate some money by linking Ad units. A product or service providers can advertise their products by using Google AdWords, on the other hand, these online Ads are shown on websites or search results which use Google AdSense. This is a big process of online advertisement between Google AdSense and AdWords. With the help of this service, you may earn some profits from your site, but it depends on your contents on your site. More quality contents, you can get good ads related to your topic.
|
|
About Google AdSense
Google AdSense suggests you a great way to generate some money from your website. There are many online Ad services, but the most trustful service would be Google AdSense. It reports you with exact, and fast data related to the embedded Ads on your sites.
As you know, I also embedded a couple of Ads into every page, displaying according to what contents are deal with, and what users' interests is on a page. Don't expect much money from Google AdSense. In the case of normal sites, I think some profits from Ads would better cover your monthly hosting fee.
This would be the best case once you add Google AdSense service to your site. Another good thing is that sometimes Ads can be useful references because Text-ads shows contents-related services or products. This is the reason I embedded Text-based google AdSense more.
How to add Google AdSense to your website
As you may know, iWeb does have Google AdSense Widget as default, so you can just drag and drop the widget to your page if you want to insert Google AdSense onto a page like any other widgets. But, you have to sign up Google AdSense Account, then you need to wait for receiving approval from Google. Usually, it takes a couple of days for Google to approve use of Ads on your site. For the almost all cases, Google will approve your site, but your site should be open, not private.
There are two methods to insert Google AdSense to your site. One is to use iWeb's AdSense Widget, and another is to use "Replace HTML". I would strongly recommend to use the latter way, "Replace HTML". This is because you can't manage Ads, and channels, furthermore you are not allowed to customize Ad styles. That's why I have never used AdSense Widget on iWeb. Forget about this widget. The advanced way would be as easy as using the widget.
Anyway, I'd like to introduce the first way: "Use Google AdSense Widget" first.
The Basic way to use Google AdSense
-
This guide is to use Google AdSense Widget on iWeb. (If your iWeb version is lower than iLife '08, you need to skip this and jump to "The Advanced way to use Google AdSense" below.) For sure, if you already used this widget, you don't need to follow this part of this tutorial. You can jump to "The Advanced way to use Google AdSense" below, right now.
-
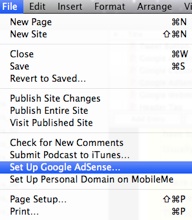
For the first, you have to have Google AdSense account. Go to "File > Set Up Google AdSense..." from the top menu.
-
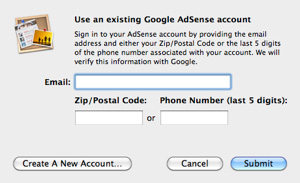
If you didn't set up Google AdSense on iWeb yet, you will see a window like the left image. You should create a new account. However, here may be a problem which Google may deny to create your account if you publish your website into Local Folder or the URL on the publishing setting doesn't work. In these reasons, I wouldn't recommend you to create a new account from this menu.
-
If you decide to create your AdSense account manually, please go here. To sign up, you will be required to fill out all fields to be submitted to Google. If you have completed, push "submit information" button at the bottom of the page. Google will let you know whether your account is approved or not in a couple of days via Email. If you receive an approval from Google, you are ready to generate some money from Google AdSense. You can follow this tutorial continually. (If Google doesn't approve, you would need to fix some problems Google indicated on Email, then retry it.)
-
If Google approved to use Google AdSense, go to "File > Set Up Google AdSense..." from the top menu, then input you Email address which can access to Google AdSense along with anther required field (Zip/Postal Code or last 5 digits of your phone number). Then, you can submit your information to Google by pressing "Submit" button. You are ready to insert Google AdSense to your site.
-
To insert Google AdSense Widget, drag Google AdSense Widget onto your page or you can insert this widget from the top menu, "Insert > Widget > Google AdSense" like below.
-
Select the Widget box you just added. You can see many options you can choose like below:
-
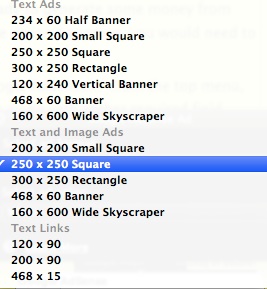
Select a banner Ad or text link you want to add. From my experiences, I would recommend Text Ads rather than Image Ads. It shows more useful services or products Ads related to your contents or users' interests collected from cookies information. (Google applies very enhanced algorithm for AdSense.)
-
Except for choosing one of those, there is no options to allow users to customize it. That's why I recommend "The Advanced way to use Google AdSense" guide below.
-
Once you publish your site, you can check your AdSense data, here: https://www.google.com/adsense. (You need to sign in.)
The Advanced way to use Google AdSense
-
Add Text box to a page you want to add Google AdSense, and then place it on your desired place.
-
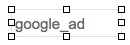
Type "google_ad" or any short words you want. I typed "google_ad" as you can see below.
-
Here, the most important thing is Don't change FONT TYPE, SIZE, and ANY OTHER PROPERTIES of TEXT. Keep it as default. Just type words in the text box.
-
Open a web browser, and go to https://www.google.com/adsense. (You need to sign in Google AdSense. If you don't have your AdSense account yet, please follow the above guide. You will need to get your site approved to use Google AdSense.)
-
The menu which is displayed on screen, depends on what Google AdSense version you use. The left image is captured from AdSense V3.
-
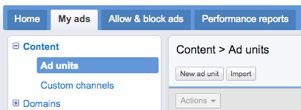
To add a new ad unit, please go to "My ads > Content > Ad units", then click "New ad unit" button.
-
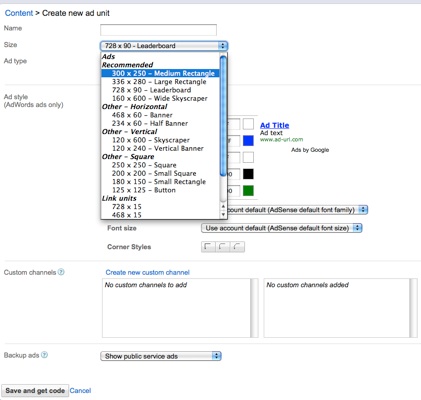
You should type an unique name on the "Name" field to distinguish this ad unit from others. With this unique name, you are able to modify the ad unit later even after you publish a page including this ad unit.
-
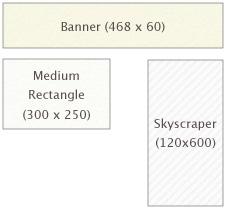
There are many sizes you should pick up. Choose one of them on the lists, then change Ad style you want. You can see all types of Ad samples at a glance, here.
-
Here is an important tip regarding Ad style. Make an Ad without border.
-
To make an Ad unit look like no border, set the border color same as the background color of a page where this Ad unit will be inserted. It will make the Ad unit look just as it doesn't have border. This is a recommendation from my experiences and google's advice to increase clicking Ads.
-
If you have done customization, click "Save and get code" button at the bottom. You can grab HTML code of this Ad unit.
-
Copy the HTML code into clipboard or somewhere, which looks like below:
<script type="text/javascript"><!--
    google_ad_client = "ca-pub-YOUR_APPID";
    /* adsense_name_300x250 */
    google_ad_slot = "6212288504";
    google_ad_width = 300;
    google_ad_height = 250;
    //-->
    </script>
    <script type="text/javascript"
    src="http://pagead2.googlesyndication.com/pagead/show_ads.js">
    </script>
-
Your Ad unit's HTML code would look like above except for the words highlighted in RED.
-
Let's go back to iWeb, then resize the text box you typed for Google AdSense. The size depends on the type of Ad unit you selected. If you select "Leaderboard (728 x 90)", resize the text box as "Width: 728px, Height: 90px".
The size of text box MUST be equal to the size of the Ad unit to be added.
-
Save your website, and then publish your site to Local Folder. If you didn't change the publishing settings on iWeb yet, please, change it to "Publish to Local Folder" right now.
-
Open "MassReplaceIt" application, and then select "Query" you want to use for your website or you can add right now. (If you didn't master Replace HTML tutorial yet, please learn it now.)
-
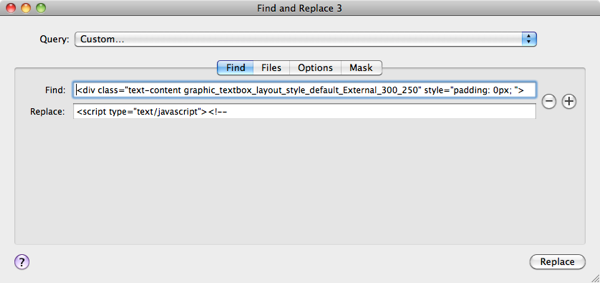
Add Find/Replace Field by pressing "+" button. Then paste the HTML code you grabbed from Google AdSense (look like the above code), into "Replace:" field of "MassReplaceIt" application.
<div class="text-content graphic_textbox_layout_style_default_External_300_250" style="padding: 0px; ">
    <div class="graphic_textbox_layout_style_default">
    <p style="padding-bottom: 0pt; padding-top: 0pt; " class="Body">google_ad</p>
    </div>
    </div>
-
Replace the words highlighted in RED. For example, if the size of your text box in which you input "google_ad", is 728px / 90px, replace 300 -> 728, and 250 -> 90. In addition, you should replace "google_ad" to the words you input. For sure if it is same, leave it.
-
If you have replaced it correctly, please copy the HTML code, then paste it into "Find:" field of "MassReplaceIt" application. It may look like below:
-
Press "Replace" button at the bottom to apply.
-
You would be noticed at what pages will be applied according to these queries. (Of course, you may have other queries on the list.) Press "Replace All" button to apply to all of them.
-
Everything is done. You just need to check whether the Ad unit from Google AdSense works right or not on your web browsers. (You can test it on offline as well.)
* You should not click the Ads units on your site even if you want to test it. Google may deactivate your AdSense account. Another thing you should know is you can insert up to 3 Ads units into a page.)
|